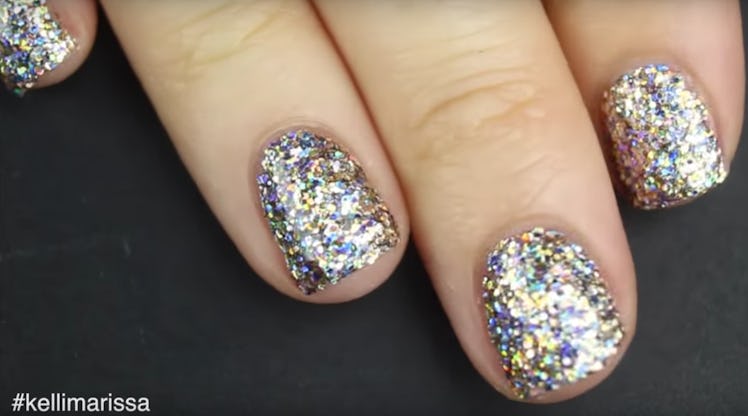
This Easy Glitter Nail Polish Hack Means No More Splotchy Sparkles In Your Manicure
The sparklier, the better — this has been one of my beauty mottos since I first discovered scented, roll-on body glitter at the age of 11. (Shoutout to Bath & Body Works circa 2002!) So when I came across a new glitter nail polish hack that's easy AF and turns fingertips into miniature disco balls, I was naturally elated.
It has always bothered me that glitter polish tends to go on rather splotchy, with certain areas of your nails oversaturated with shine and others devoid of sparkle entirely. I can remember applying four or five coats of the stuff in high school just to get an even sheen, which of course makes the polish take on a thick, plastic-like consistency that peels off in a matter of days. In college, I discovered that a metallic base coat plus two layers of glitter polish resulted in a more desirable, longer-lasting shimmer, but it still wasn't the full-on twinkle that I wanted.
YouTuber Kelli Marissa must be my fairy godmother, because her tutorial on how to effectively apply glitter nail polish — meaning how to apply it in a way that negates all of the aforementioned issues and more — has just made my biggest beauty dream come true. Follow her how-to, and you'll be left with the flashiest fingertips you've ever seen that are perfect for festivals, nights out, and more. Read on for a step-by-step breakdown of the tutorial, and watch it in its entirety below.
First, make sure your nails are entirely devoid of polish and have been clipped to your desired length. Then, start by applying a clear base coat to your nails to help the glitter polish last as long as possible. This step also helps create a barrier between your nails and polish, which can have damaging effects.
After the base, you'll want to paint liquid latex onto the skin surrounding your nails. This will prevent any glitter polish you accidentally paint on your skin from sticking to it, as the latex will later be peeled off. Amazon offers an array of different options from $3.99 and up, meaning this step certainly won't break your bank. Plus, if you're prone to painting outside of the lines when it comes to DIY manicures, this is a great product to have on hand. (No pun intended.)
Next, grab a standard makeup sponge and paint your glitter nail polish onto one corner of it. The sponge will soak up the excess liquid base of the polish, meaning all that will be left is a concentrated glitter substance.
Dap the glittery corner of the makeup sponge onto your nail. You'll see that it applies in a thick and totally opaque manner, with no splotchy coverage in sight! You might have to go over your nails a second time, depending on your polish, but the results will be almost holographic.
After your nails are dripping in glitter, peel off the liquid latex you applied around your nails for an especially crisp manicure. And finally, coat the nail with a top coat to ensure your manicure will last. For an added shimmery kick, Teen Vogue recommends using a glitter top coat, like Deborah Lippman's Candy Shop Glitter ($20, Amazon) or Jinsoon's Soirée ($20, Amazon).
Et voila! The most sparkly nails on earth can now be found on your very own fingertips. I'll be trying this tutorial with my personal favorite glitter polish, Essie's A Cut Above ($9, Amazon). A saturated rosy shade, it's a far cry from the standard silver and gold shimmer and will add an extra punch to the shine.
Essie's A Cut Above, $9, Amazon
If you really want to get flashy, pair your new manicure with this epic glitter makeup look. It doesn't need to be New Year's Eve to shine bright like a diamond — just ask RiRi.