
7 Ways To Upgrade Any Pic You Take To Photographer Status
While not everyone wants to be a professional photographer, nearly everyone wishes they could take better photos. Our smartphones let us snap like never before, leaving us with a thousand pictures of a sunset, only to realize 999 of them are garbage.
As a travel writer, I am always on the road taking copious pictures. A week long trip can yield over 1000 pictures!
But it wasn't until I came in touch with Laurence Norah that I started to actually get better at photography. Laurence has been a professional photographer for over ten years.
We met at a conference in Spain and he's been helping me improve my photographs ever since. He blogs at Finding the Universe, has over 780,000 fans on his Facebook page and teaches a course on travel photography. His work has appeared in national publications and he regularly talks at conferences about photography.
So I asked Laurence to share his advice with you on how to take better photographs rather than keeping that knowledge all to himself. By knowing just a few simple rules, you can capture that special moment and save yourself hours deleting horrible pictures and editing to achieve perfection.
1. Follow the Rule of Thirds
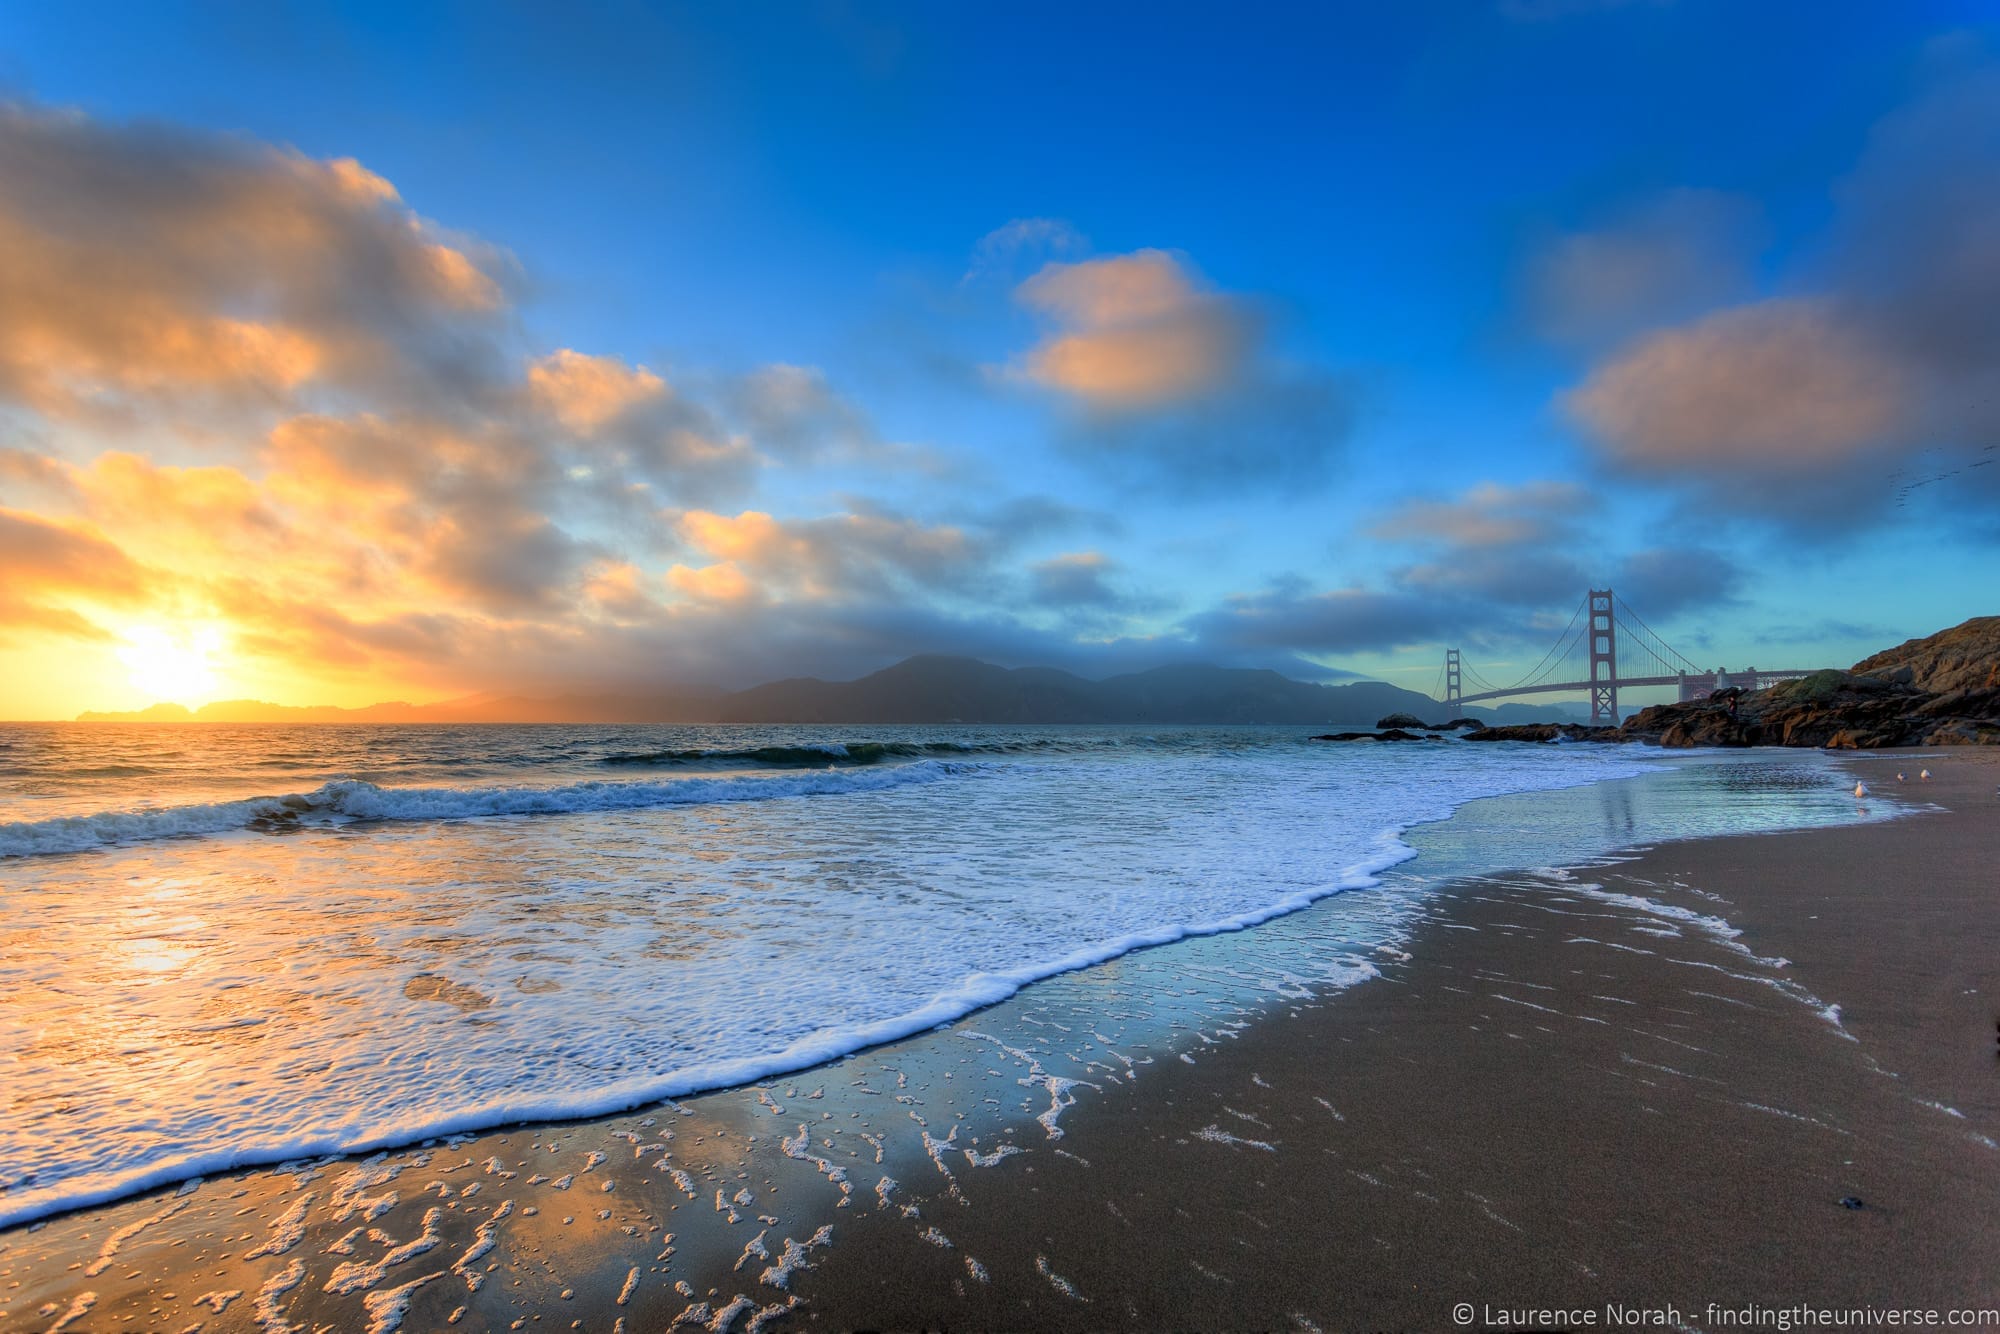
.jpg)
A super simple way to get a better-looking shot is to start thinking about your image in terms of thirds. This is easy to do, particularly because most devices these days come with an option to overlay a grid on the screen. Always leave the grid feature on, so you remember to think this way.
According to Laurence, "If you place key subjects at the intersection of the grid lines, and ensure that different parts of the image (land vs. sky, for example) are divided into thirds (rather than half and half), you're going to end up with a far more visually pleasing image."
The rule of thirds is essentially a simplified version of the “golden ratio,” a pattern that is found in nature all around us and that has been used to create countless visually pleasing artworks through the centuries.
This is the most basic photography principle out there (every photographer I know talks about it), and if you at least remember to do this, you'll be vastly ahead of where you are now.
2. Lead Your Viewer Into the Shot
"It's important to give your viewer visual cues for your images, something which will help them know where to look. An easy way to do this is with natural features like roads, railway lines, rivers — basically any part of the image that the viewer's eye can lock onto and follow into the image," says Laurence.
This “leading line” can lead to a distant vanishing point, or to the subject — like a road leading up to a mountain, for example.
Leading lines don't have to be straight; the idea is that they provide a guide for the viewer to navigate your scene. Our eyes are drawn to these lines, and our minds want to investigate where they go. So we follow a curving mountain road to its destination, and we'll follow a train track into the distance.
Leading lines can provide scale and context as well as visual guidance. It's a lot easier to understand the size of a mountain from a frame of reference we understand, such as a road or power line.
3. Use Color Effectively
An excellent way to make your image stand out is to use color, specifically, combinations of color that have been identified as working well together. The science of color matching is well established and researched; the easiest way to figure out which colors are going to work well together is to look at a color wheel.
According to Laurence, "As a rule of thumb, colors opposite each other on the wheel work well together, for example, yellow and blue (like a sunset ), or red and green. We see this science all around us in the world on a regular basis — think of festive decorations where red pairs with green, or purple matches silver, or yellow sunflowers are set against a blue sky." (Fun Fact: Color psychology is also a real field, with brands and marketers spending a great deal of time planning which colors to use, and how they will make people react and feel about their products.)
Like dividing your image into thirds, color matching doesn't need to be an even split between one color and the next. Just a splash of one color in your subject can really make it stand out from the rest of your shot.
4. Make it Three Dimensional
Photos often lack depth. We are viewing a three-dimensional world in a two-dimensional image so we often lose the perspective and depth that comes with seeing with your eye.
However, according to Laurence, there is a pretty easy fix.
You just need to think about what's in the foreground and background of your shot, and make sure you're putting clues into them. A mountain range on its own can look pretty flat. A mountain range with a tiny house or some people in the foreground or mid-ground of a shot suddenly starts to look more three-dimensional and provides depth, size and perspective.
Our brains aren't great at figuring out scale until we give them some help. The more help we give the people looking at our images, the easier it will be for them to love them.
5. Find the Patterns
Our brains love patterns and symmetry. In fact, we seek out patterns where none exist. So giving the brain a pattern to play with is an easy shortcut to a great image. This is why shots that include a reflection tend to be popular (for example, a row of houses reflected in water, or a sunset reflected in a calm sea).
Think also of shots of doorways and windows. These tend to be symmetrical, mirrored from left to right, so they are also visually pleasing.
There are patterns all around us, from the stars in the skies to rocks on a beach, from the fractal patterns in leaves to the swirls on a butterfly's wings. It's an easy way to improve your shots.
6. Put a Frame Around It

"There's a reason we like to hang photos and art in frames. It isolates the content and directs our minds to the subject," says Laurence. And, according to him, we can use this knowledge to further enhance our shots, by creating frames inside our shots themselves and directing the viewer to the subject.
One great example of this is a shot through an open window. The window “frames” the shot for us, making it obvious what it is about. Frames can also be a bit more tenuous, like the branches of a tree or the railings of a fence.
Also, frames don't need to fully enclose the image. You can frame a shot on a couple of sides; the effect will still work.
7. Make the Focus Clear
One of the most powerful ways to highlight a subject is by making it the only part of the image that is sharp and in focus, and by blurring out the rest of the shot. This can be achieved in-camera by adjusting the camera's aperture.
What's that?
"The aperture is the opening in the lens through which light passes, and we can make it bigger (wider) or smaller. Making the aperture bigger allows more light into the camera and also gives us what is called a reduced (or shallow) depth of field. A reduced depth of field means that less of the image is in focus, giving you that effect where your subject is sharp and in focus, and the background and foreground are blurred and no longer distracting," writes Laurence.
To get that shallow depth of field you need to be shooting with a wide aperture. The smaller the number after the “f” value, the wider the aperture is. Aim for “f” values of f/4 and smaller to get maximum depth-of-field effects.
Don't worry if this sounds complicated. It's really pretty easy. Just find the “aperture priority” mode on your camera, activate that, and set the aperture to the smallest number your lens supports. The camera will take care of everything else for you.
Photography is a skill, and the more you practice, the better you get. By following Laurence's seven simple rules, you'll begin to see with a photographer's eye when you travel and better capture those life-changing memories and moments. You'll shoot with purpose and have your photos wowing your friends in no time.
Matthew Kepnes is the creative force behind NomadicMatt.com, the world's largest travel blog on budget travel, as well as author of the New York Times bestseller, “How to Travel The World On $50 A Day.”
