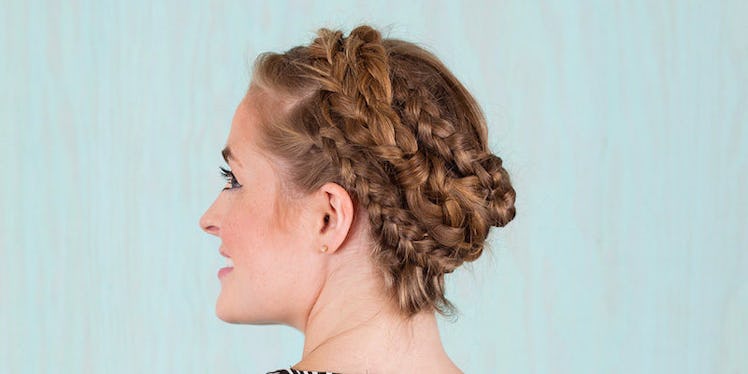
Long-Haired Girls, This Fancy Spiral Braid Is Perfect For You
There are two types of braids.
There are the classics: the basic three-strand, the fishtail and the Dutch, all five-minute 'dos that most of us could pull off after watching a YouTube tutorial and drinking a glass of red wine.
Then, there are the braids on the opposite end of the spectrum — the eye-popping, head-scratchingly intricate kind of braids you see all over Pinterest. You may think you couldn't possibly pull these braids off yourself. Way wrong, you guys!
Here, I'm showing you how to DIY one of the most elaborate-looking braids around: the spiral braid.
With this simple tutorial, you can execute this braid before a wedding, date or birthday bash. Long haired-girls, this is especially your time to shine!
First, prep your hair to add texture to your ornate braid.

Whenever you make a braid, it's best to make sure your hair has a little bit of a rough texture to hold it in place. That'll make it easier for you to style.
Spray a dry shampoo from your roots all the way through the ends of your hair, tousling to disperse the product evenly.
Part your hair and start your first Dutch braid.

Place a heavy side part in your hair.
Then, begin to Dutch braid — aka an upside-down French braid — the entire front portion of your hair, taking the front section from the thicker side.
Continue your Dutch braid all the way until you reach the nape of your neck on the opposite side of your head.
When you reach this place, you can stop adding hair into the braid and switch to a traditional three-strand braid until you get to the ends. Tie off the braid with a small elastic.
This is braid #1.
Make two more sections and keep braiding.
Divide the hair on the other side of your part into two sections.
Starting with the section closest to your face, create small Dutch braid that wraps around in the opposite direction from your first. Secure it with an elastic when you reach the ends, creating braid #2.
Repeat the same technique on the middle section of hair as well, which we'll call braid #3.
This is how your three braids should look at this point:
Wrap and pin your braids.

Start with the braid #3, wrapping it up and around your head. Pin the ends in place directly into the beginning of the braid.
Move to braid #1, wrapping it in the opposite direction and pinning.
Finally, take braid #2 — the one that's closest to your face — and repeat the process.
Step 4: Soften the look by pancaking the braids.

Use your fingers to gently separate the braid throughout to make it look softer and more modern. It will leave you with a slightly unkempt feel.