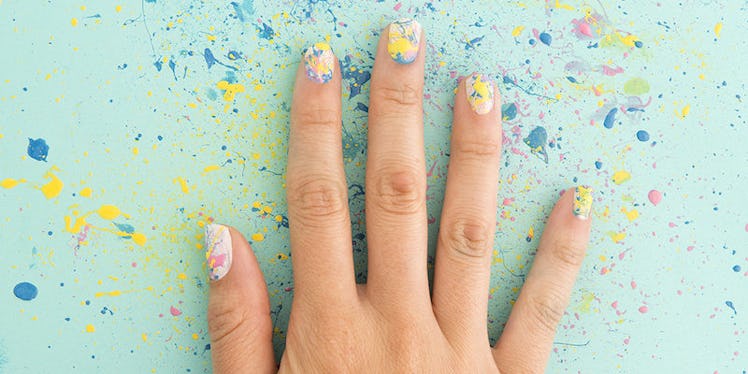
This DIY Splatter Paint Nail Art Is The Must-Try Manicure Of The Summer
Confession time: I am terrible at painting my nails. My usual “technique” for manicures includes slapping paint on my nails, letting them dry, then taking a shower to remove all the polish I got on my skin. Basically, I'm the target user for spray paint nails.
That being said, I love having fun, colorful nails, so I keep trying new manicure designs. The latest trend in the nail art world is splatter manis, which reminded me of one of my favorite artists, My Friend Court, who taught our acrylic painting class. Even for a nail art novice like myself, I found these nails were really easy to achieve. Plus, just by changing the colors, you can make them work for a bridal shower, an outdoor tea party or even a rainbow party.
As with all nail art, the key is being patient and waiting for the polish to dry completely before doing anything else. I have ruined countless manicures by thinking the polish was dry and then messing them up by washing my hands. So, get your Netflix queue ready, and let's start splatter painting.

Materials:
1. Nail polish
2. Paper plate
3. Straws
4. Q-tips
5. Nail polish remover
6. Tape
7. Scissors

Instructions:
1. Start with a solid nail color base.

2. Cut straws in half.

3. Tape around your nails. It'll make cleaning up much easier.

4. Dip one end of a straw in one color of nail polish. Make sure the entire end of the straw is covered. Place the straw a couple inches over a nail and blow into the other end.

Pro tip: When you blow, pronounce a “T” sound, instead of just blowing air through the straw. This will splatter the paint more.
5. Splatter more colors on your nails.

PSA: You WILL get nail polish everywhere.
6. Once the polish is completely dry, remove the tape from your nails. Clean up any unwanted nail polish with a Q-tip dipped in nail polish remover.

I'm like Jackson Pollock with these bad boys!

What other nail art trends are you trying? Share your photos with us on Instagram using the hashtag #iamcreative and tag @BritandCo. Need even more mani inspiration? Head to Pinterest STAT.
DIY Production + Styling: Irene Lee Photography: Kurt Andre