6 Easy Halloween Nail Art Designs That Don't Require Special Skills
Annie's orphans once said, "You're never fully dressed without a smile." But we say, "No outfit is complete without a manicure."
This Halloween, think outside the box and create a look vastly different from your basic fall mattes and dark hues. After all, your nails deserve a creative costume just as much as your body does.
You don't have to be an artist create these looks, all you need is a steady hand and the willpower to make it happen.
Here are six different Halloween nail designs. Nail pens are suggested, but not entirely necessary.
For a Catwoman look that's less Anne Hathaway and more Michelle Pfeiffer:
Colors you'll need: yellow, black, orange and silver.
Step 1: Draw two ovals, using the orange as a base for the eyes.
Step 2: Place two yellow dots on the centers of the orange ovals.
Step 3: Draw two black slivers in the centers of the yellow dots to complete the eyes.
Step 4: Complete by placing three silver whiskers under each eye.
For when you need to flash the evil eye to the person wearing the same costume as you:
Colors you'll need: red, black, white and green.
Step 1: Start off with a white ball in the center of your nail.
Step 2: Outline your eyeball using the black polish.
Step 3: Place a green dot on the center of the white ball.
Step 4: Finish by adding a few red veins to the white area of your eyeball.
For when you settled on a Robin costume but still want to rep Batman:
Colors you'll need: black and orange.
Step 1: Start off by drawing the exterior shape of your bat, lining the top and bottom.
Step 2: Connect those lines by the wings, completing the outline of your bat.
Step 3: Color the inside of your bat entirely black.
Step 4: Finish by drawing a baby bat just below the other one, following the same steps.
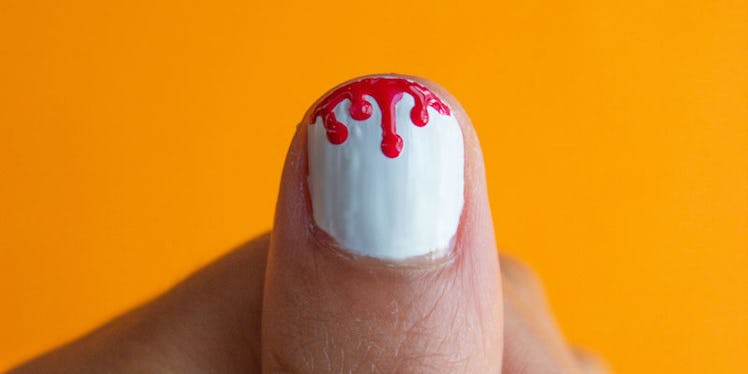
In anticipation of getting way too drunk and scraping your knee:
Colors you'll need: white and red.
Step 1: Start off with a clean white nail as your base.
Step 2: Draw 4 or more red dots, lining the base of your blood drips.
Step 3: Draw the red upwards from the dots towards the tips of your nails, connecting the red along the bend of your nail.
For when you don't feel like smiling:
Colors you'll need: black and white.
Step 1: Draw two medium-sized black ovals on the center of your nail.
Step 2: Place a wide line exceeding the width of both eyes as the base for Jack's smile.
Step 3: Line the smile with stitches evenly placed across the nail.
Step 4: Lastly, draw two small stitches between the base of the eyes to complete Jack's nose.
For when you're feeling a little basic:
Colors you'll need: clear, white and black.
Step 1: Over a clear coat of polish, outline the ghost's two arms and head.
Step 2: Once the ghost is dry, place two black dots at the top center of the ghost, completing the eyes.
Step 3: Finish out by drawing a squiggly line below the eyes to establish the mouth.