This New Camera Mode On iPhone 13 Will Make Your Vids Professional AF
Get yourself a director’s chair because you’ll be a pro in no time.
Apple didn’t hold back when it came to the iPhone 13 lineup. The iPhone 13, 13 mini, 13 Pro, and 13 Pro Max all have the most advanced camera systems for iPhone yet. Usually, the coolest features are reserved for the priciest phones, but the entire iPhone 13 lineup is equipped with Cinematic mode. The new camera feature creates professional-looking videos, but it can be daunting to navigate. Once you know how to use Cinematic mode on iPhone 13 to adjust focus and edit videos to your preferences, though, you’ll never want to film any other way.
When I said Apple did not come to play with the latest iPhones, I wasn’t kidding: The new diagonal lenses on the iPhone 13 and 13 mini make for the most advanced dual-camera system in an iPhone, and iPhone 13 Pro and 13 Pro Max’s camera comes loaded with three all-new lenses. All four models will make your photos and videos look better than ever before — and Cinematic mode will take it to the next level. The new Cinematic mode was created to facilitate a depth-of-field effect that automatically keeps a sharp focus on your subject and blurs the foreground or background. It even stabilizes to account for movement from whoever is filming it, so a tripod isn’t a necessity to get the professional outcome.
Focus
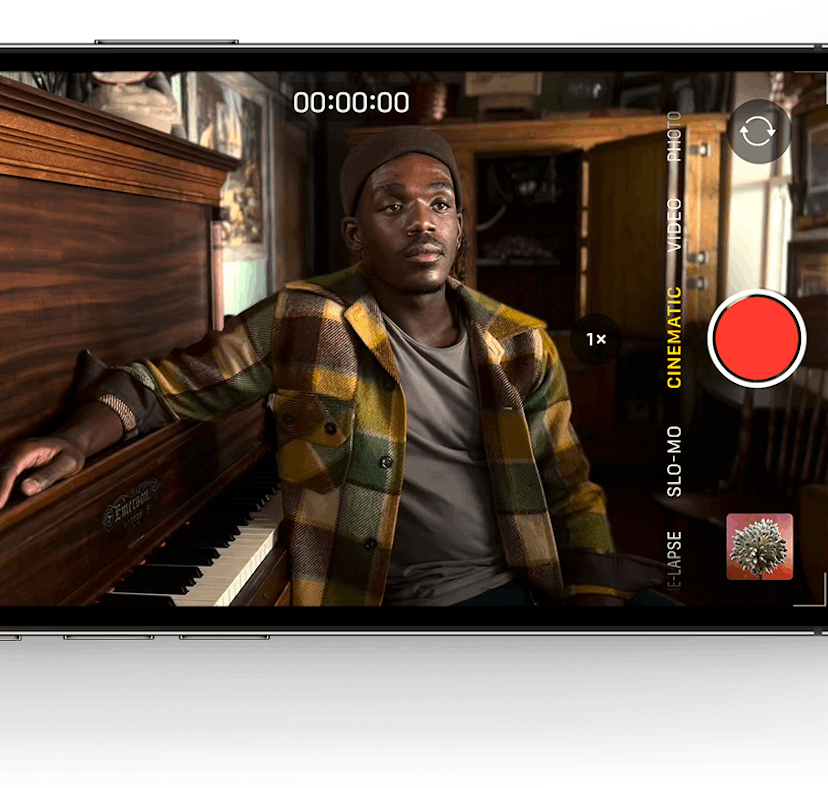
To use Cinematic mode, make sure you’re updated to iOS 15, and then open your camera on any iPhone 13 model and scroll to the right twice until you get to “CINEMATIC.” From there, you can start filming, and the camera will automatically focus on the subject in the foreground (people, pets, objects), lightly blurring out the background. As you continue to film, the focus will shift automatically when a new subject presents itself. For example, if two people are walking with one behind the other, the focus will shift on the second person as they both walk closer to the camera and the first person moves out of frame.
If you don’t like the way Cinematic mode focuses automatically, you can tap the yellow square as you film and adjust where the focus is manually. You can also double-tap on a subject to set automatic focus there for the duration of the video.
Once you want to end your video, you can tap the red record button to stop it.
Editing
Not a fan of the way your video turned out after watching it back? No problem — you can adjust so many facets of the video with editing. You can edit Cinematic mode videos in the Photos app on devices other than what it was filmed on if they are running iOS 15 or iPadOS 15. Compatible devices include Phone XS, iPhone XR, and later, iPad Pro 12.9-inch (3rd generation and later), iPad Pro 11-inch (1st generation and later), iPad Air (3rd generation and later), and iPad mini (5th generation and later). macOS capability is set to come in a later update.
To scrap all the focus changes you can simply open your video, tap “Edit,” and then tap the yellow “Cinematic” at the top to turn it off. (You can always turn it back on with the original focuses.)
To change specific focus points in the filmed video, you can play it or slide the vertical white bar in the frame viewer to the part you want to adjust. Once you decide on a new focus subject, you can tap it to put the yellow square around it in a single frame, or you can double-tap it to make that the automatic focus for the rest of the video.
To remove certain focus points (without placing them on another subject), you can simply tap on the yellow (manual focus changes) or white (auto focus changes) dots underneath the video and delete them by tapping the trash can icon. You can toggle between seeing manual and auto focuses in by tapping the yellow square in the top left corner — when it’s yellow, you’ll see manual focus points, and white will show you auto focus.
Once you’ve made all the changes you want, you can select “Done.” You can also go back and make more adjustments later if you want to switch it up again.
More Options
In addition to choosing focus in filming and editing, you can adjust depth of field, which affects how far in the foreground your subject appears. To do so before filming, tap the “f” in the top right corner and adjust it to your desired depth — lower numbers will make the background more blurred and higher numbers will make it less so.
In editing, you can tap the “f” in the top left corner that will have a number of the current depth of field next to it, and adjust from there. Keep in mind that in both filming and editing, the depth of field will apply to the entire video, not just certain frames.
Finally, if you do your editing on a supported device (that you didn’t film the video on), make sure to use iCloud Photos or AirDrop and turn on all the photo data (which you can do under “Options”) before you share it.
There’s a lot to explore with Cinematic mode, but once you have the basics down, you’ll be able to film like a pro.
This article was originally published on